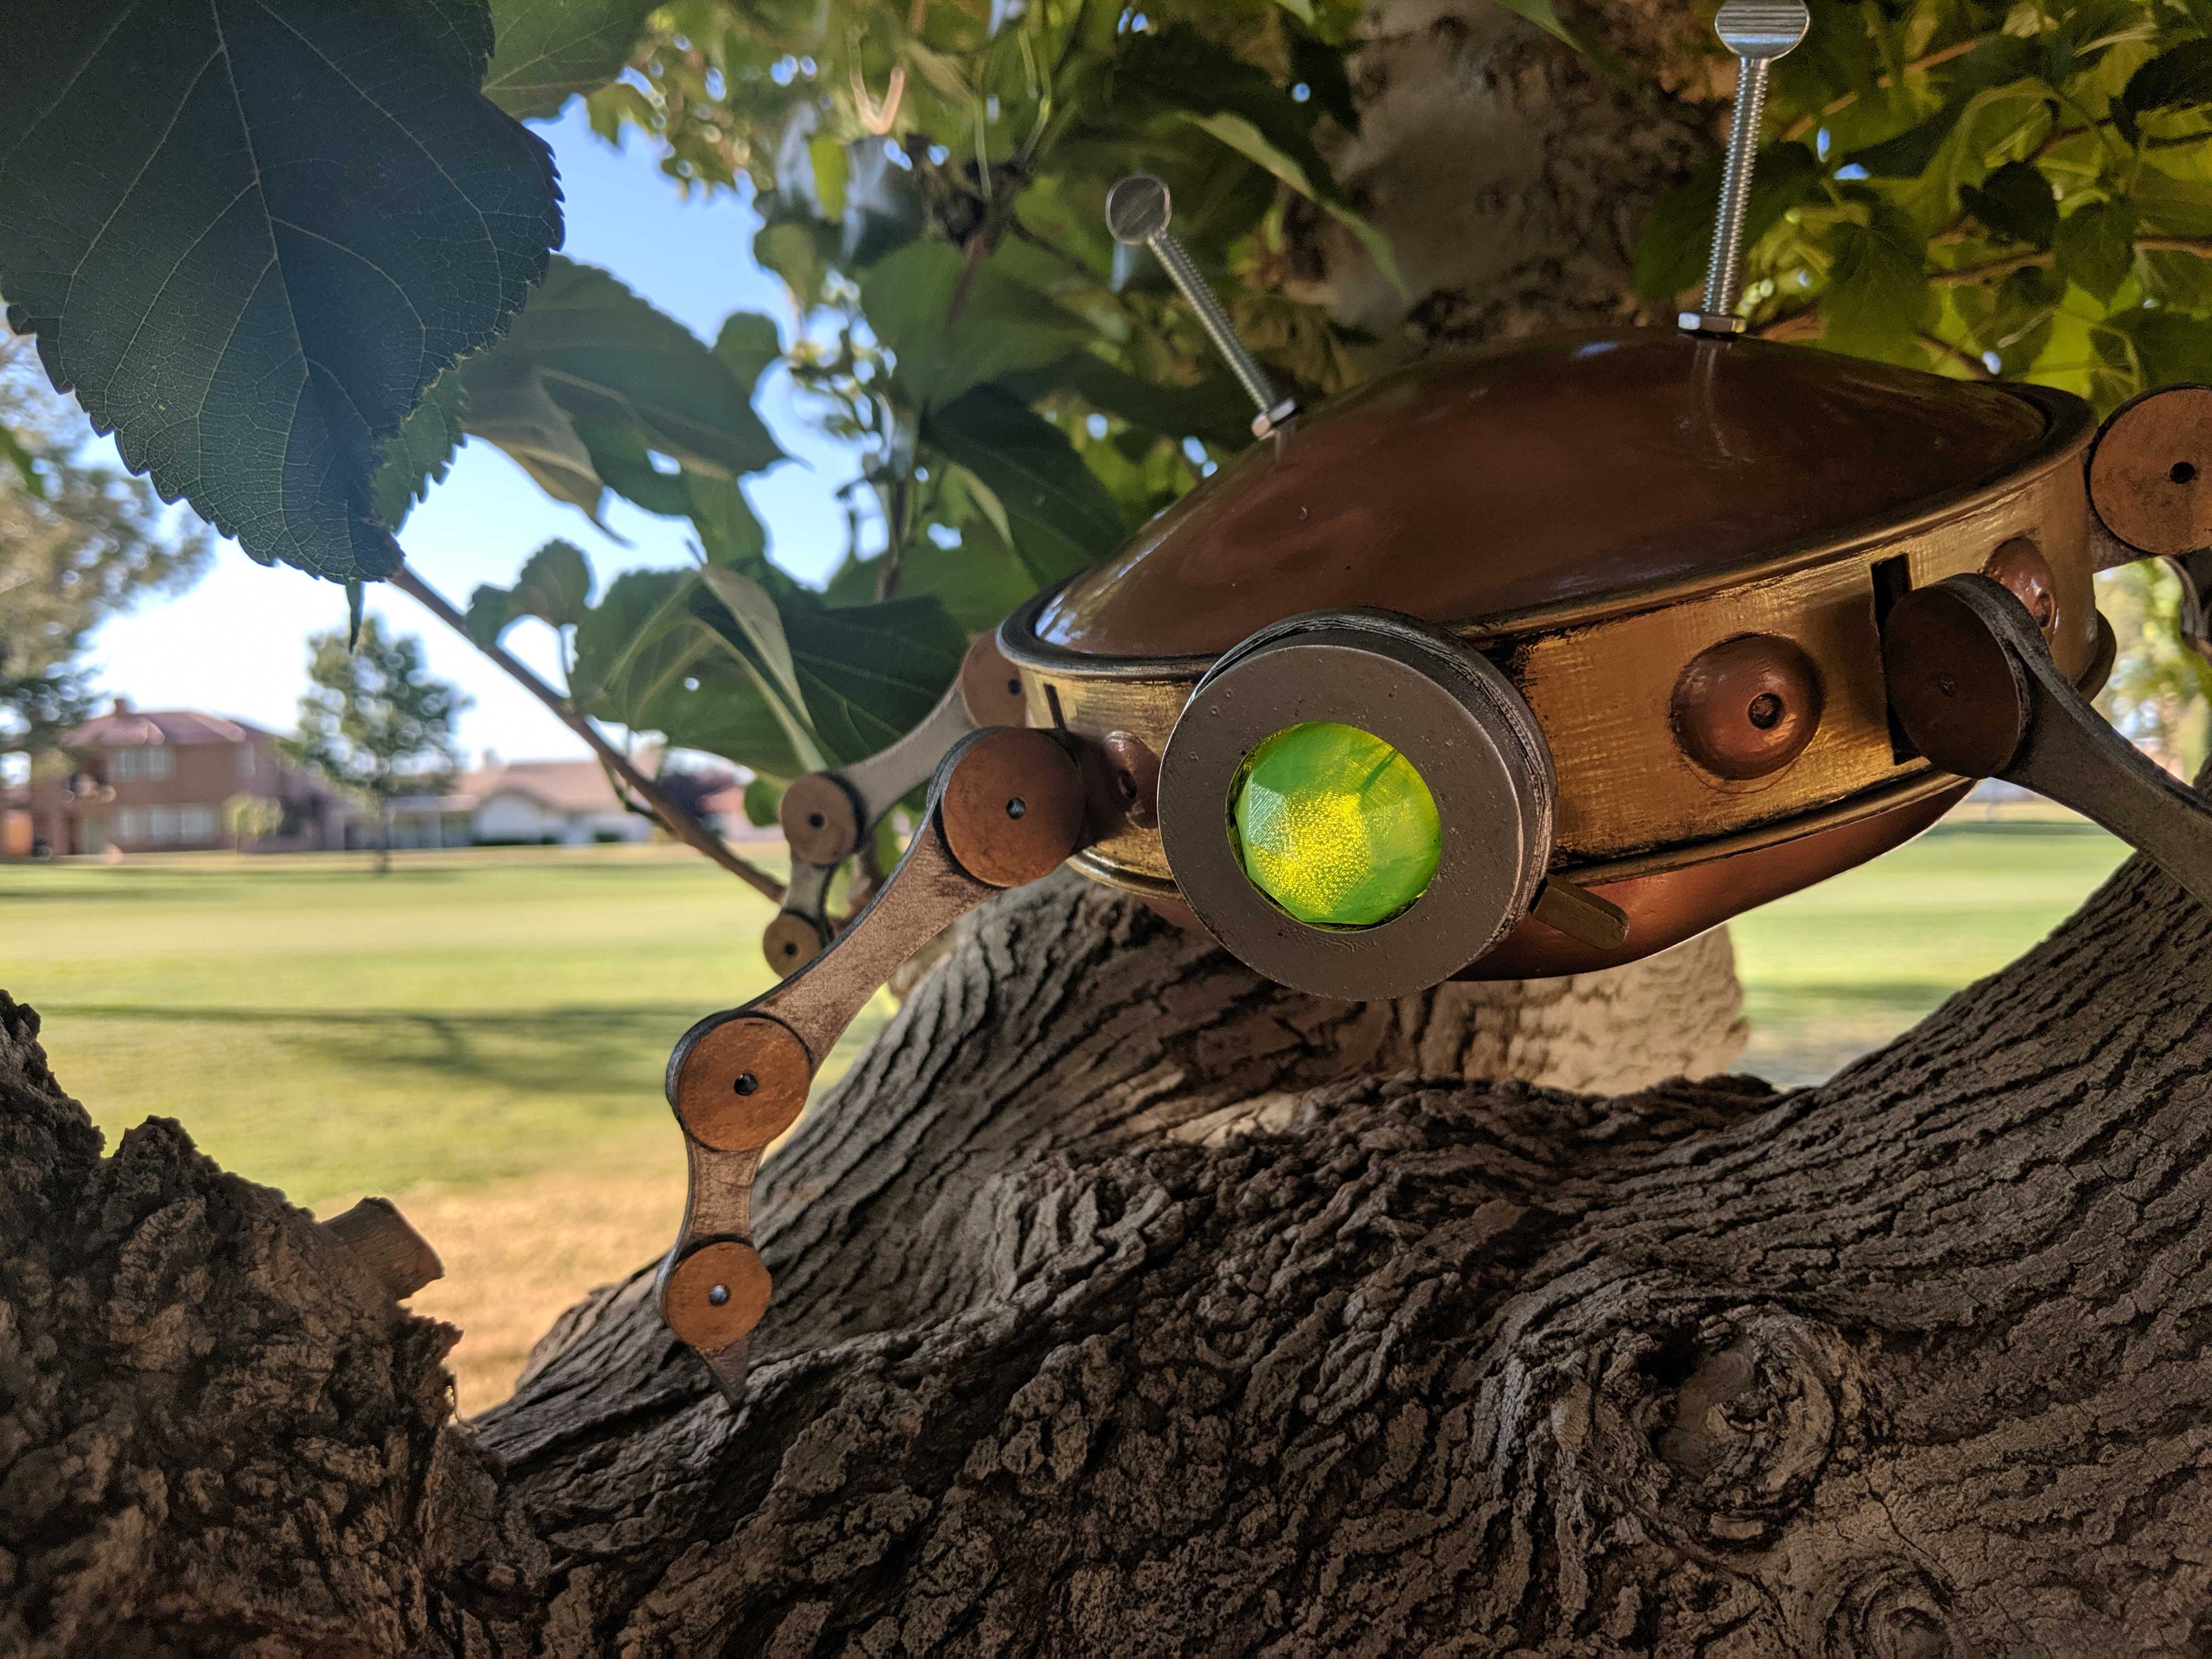
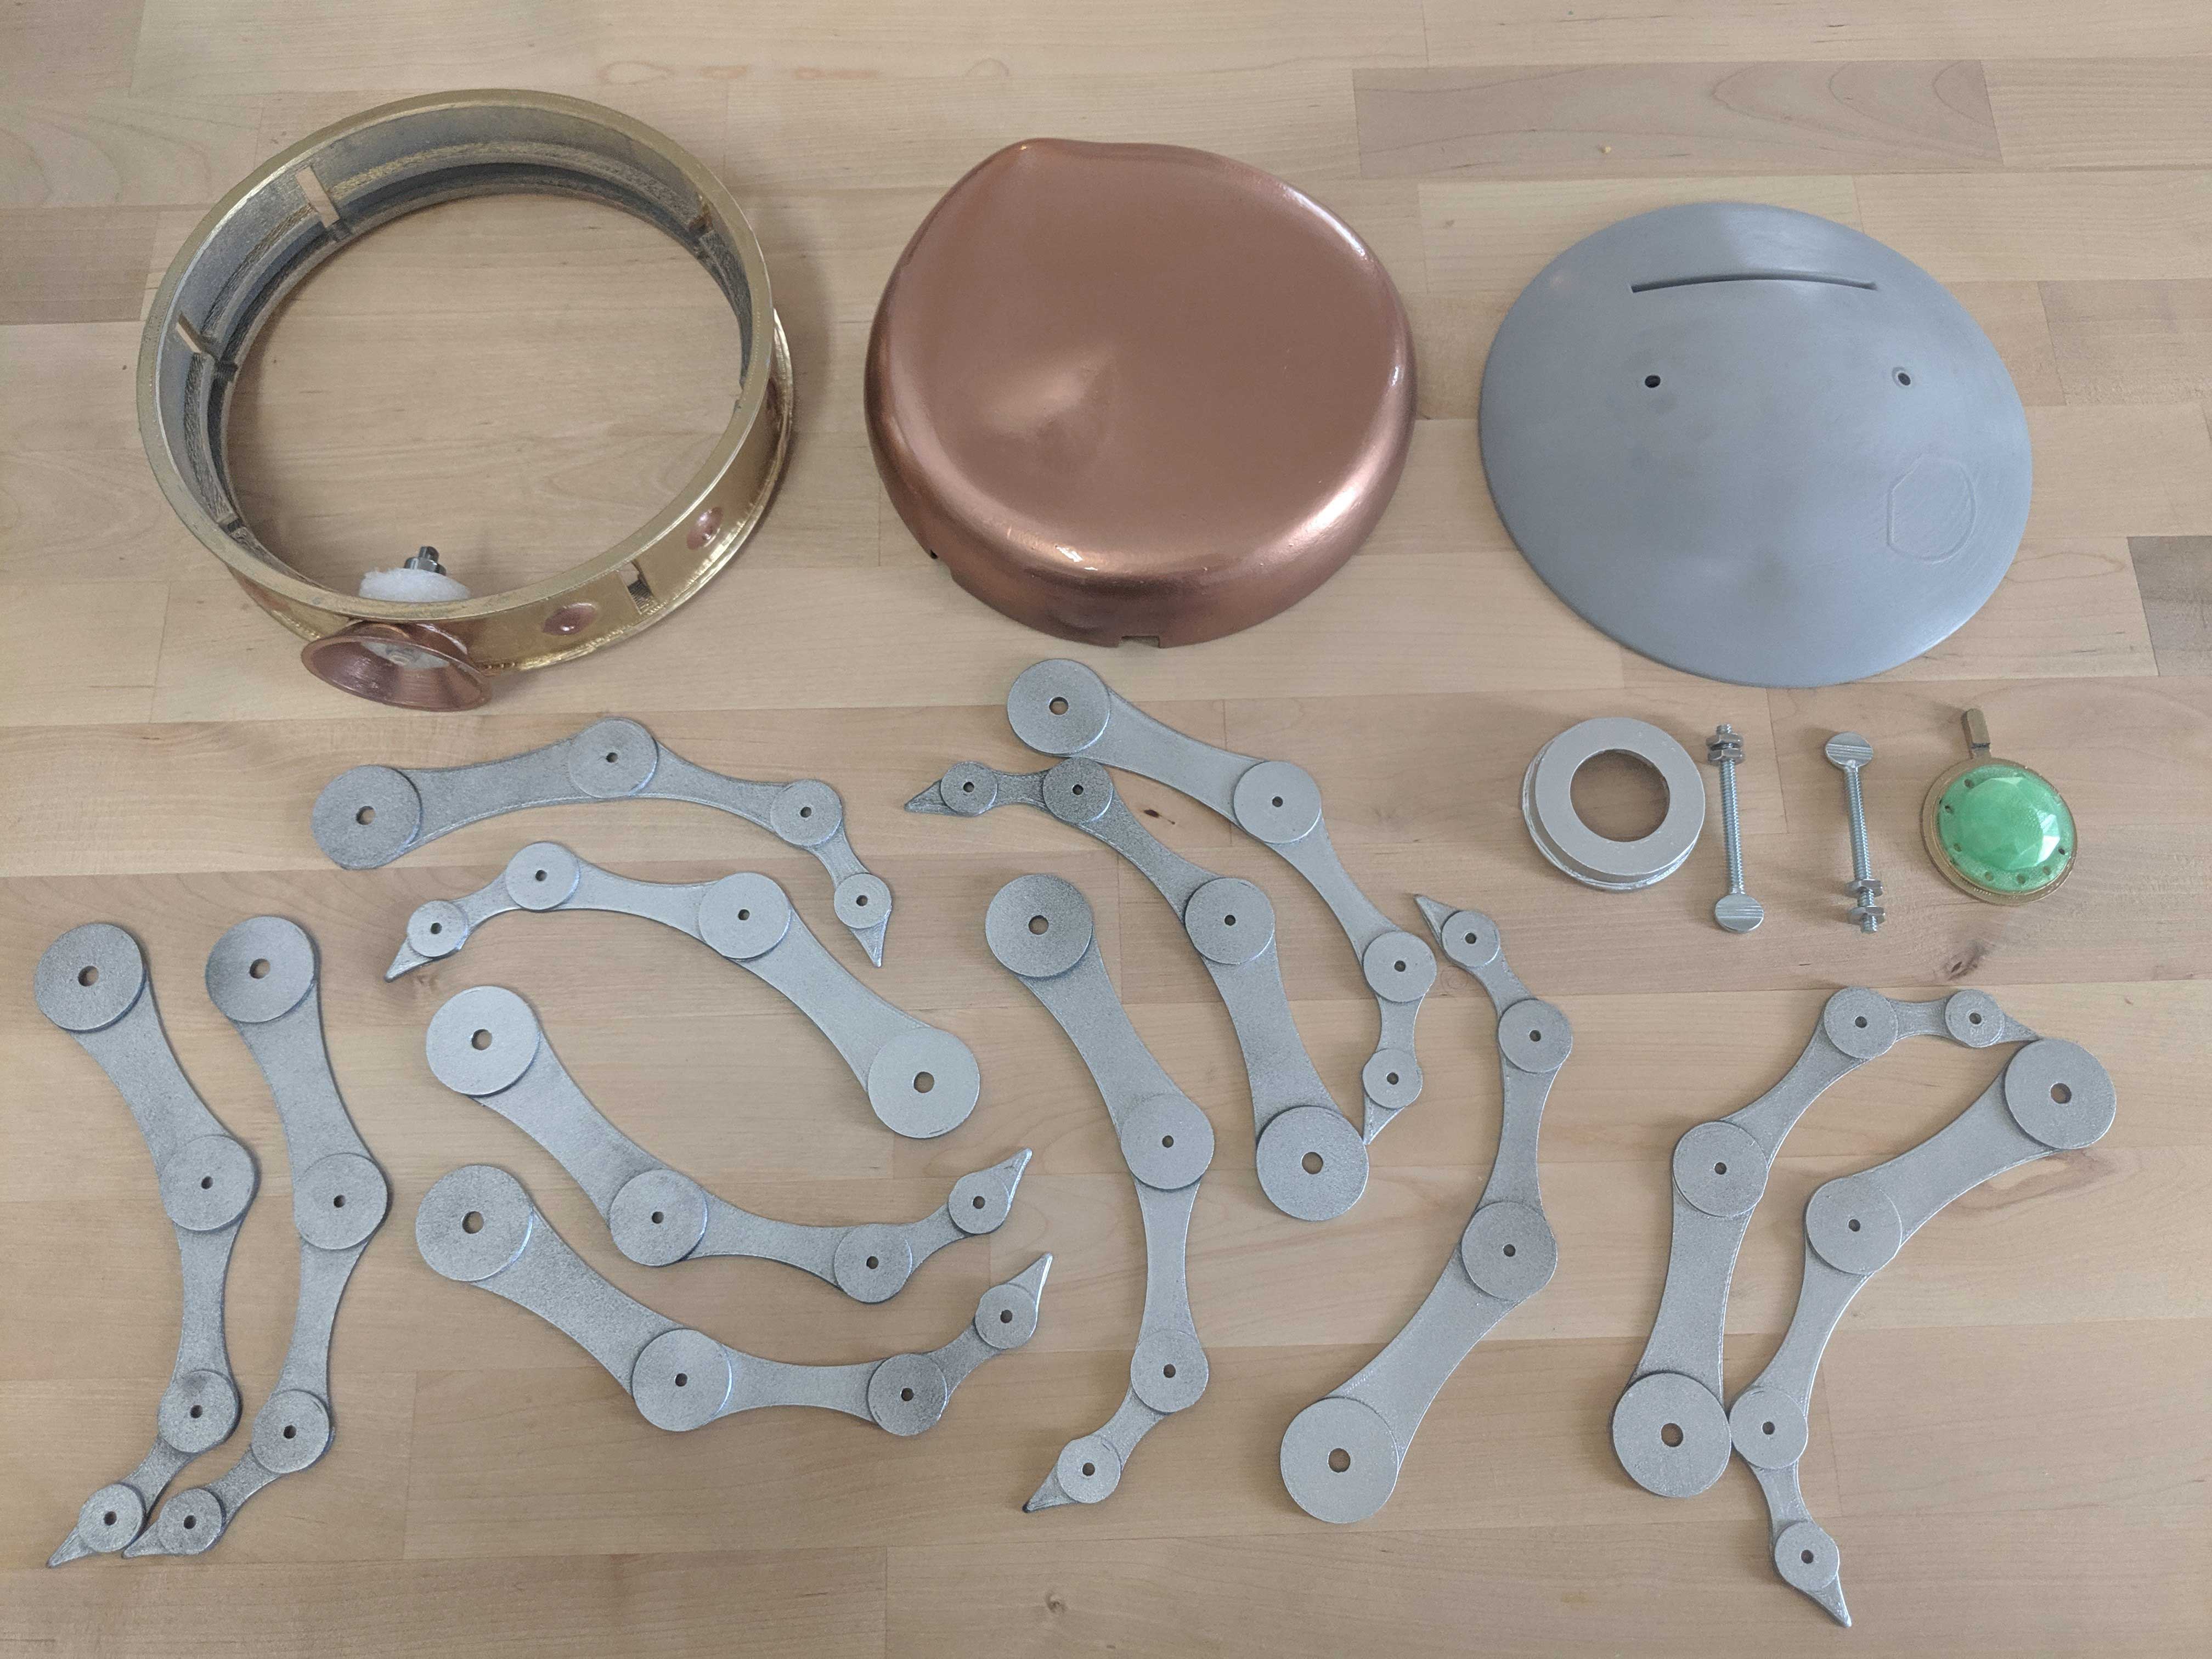
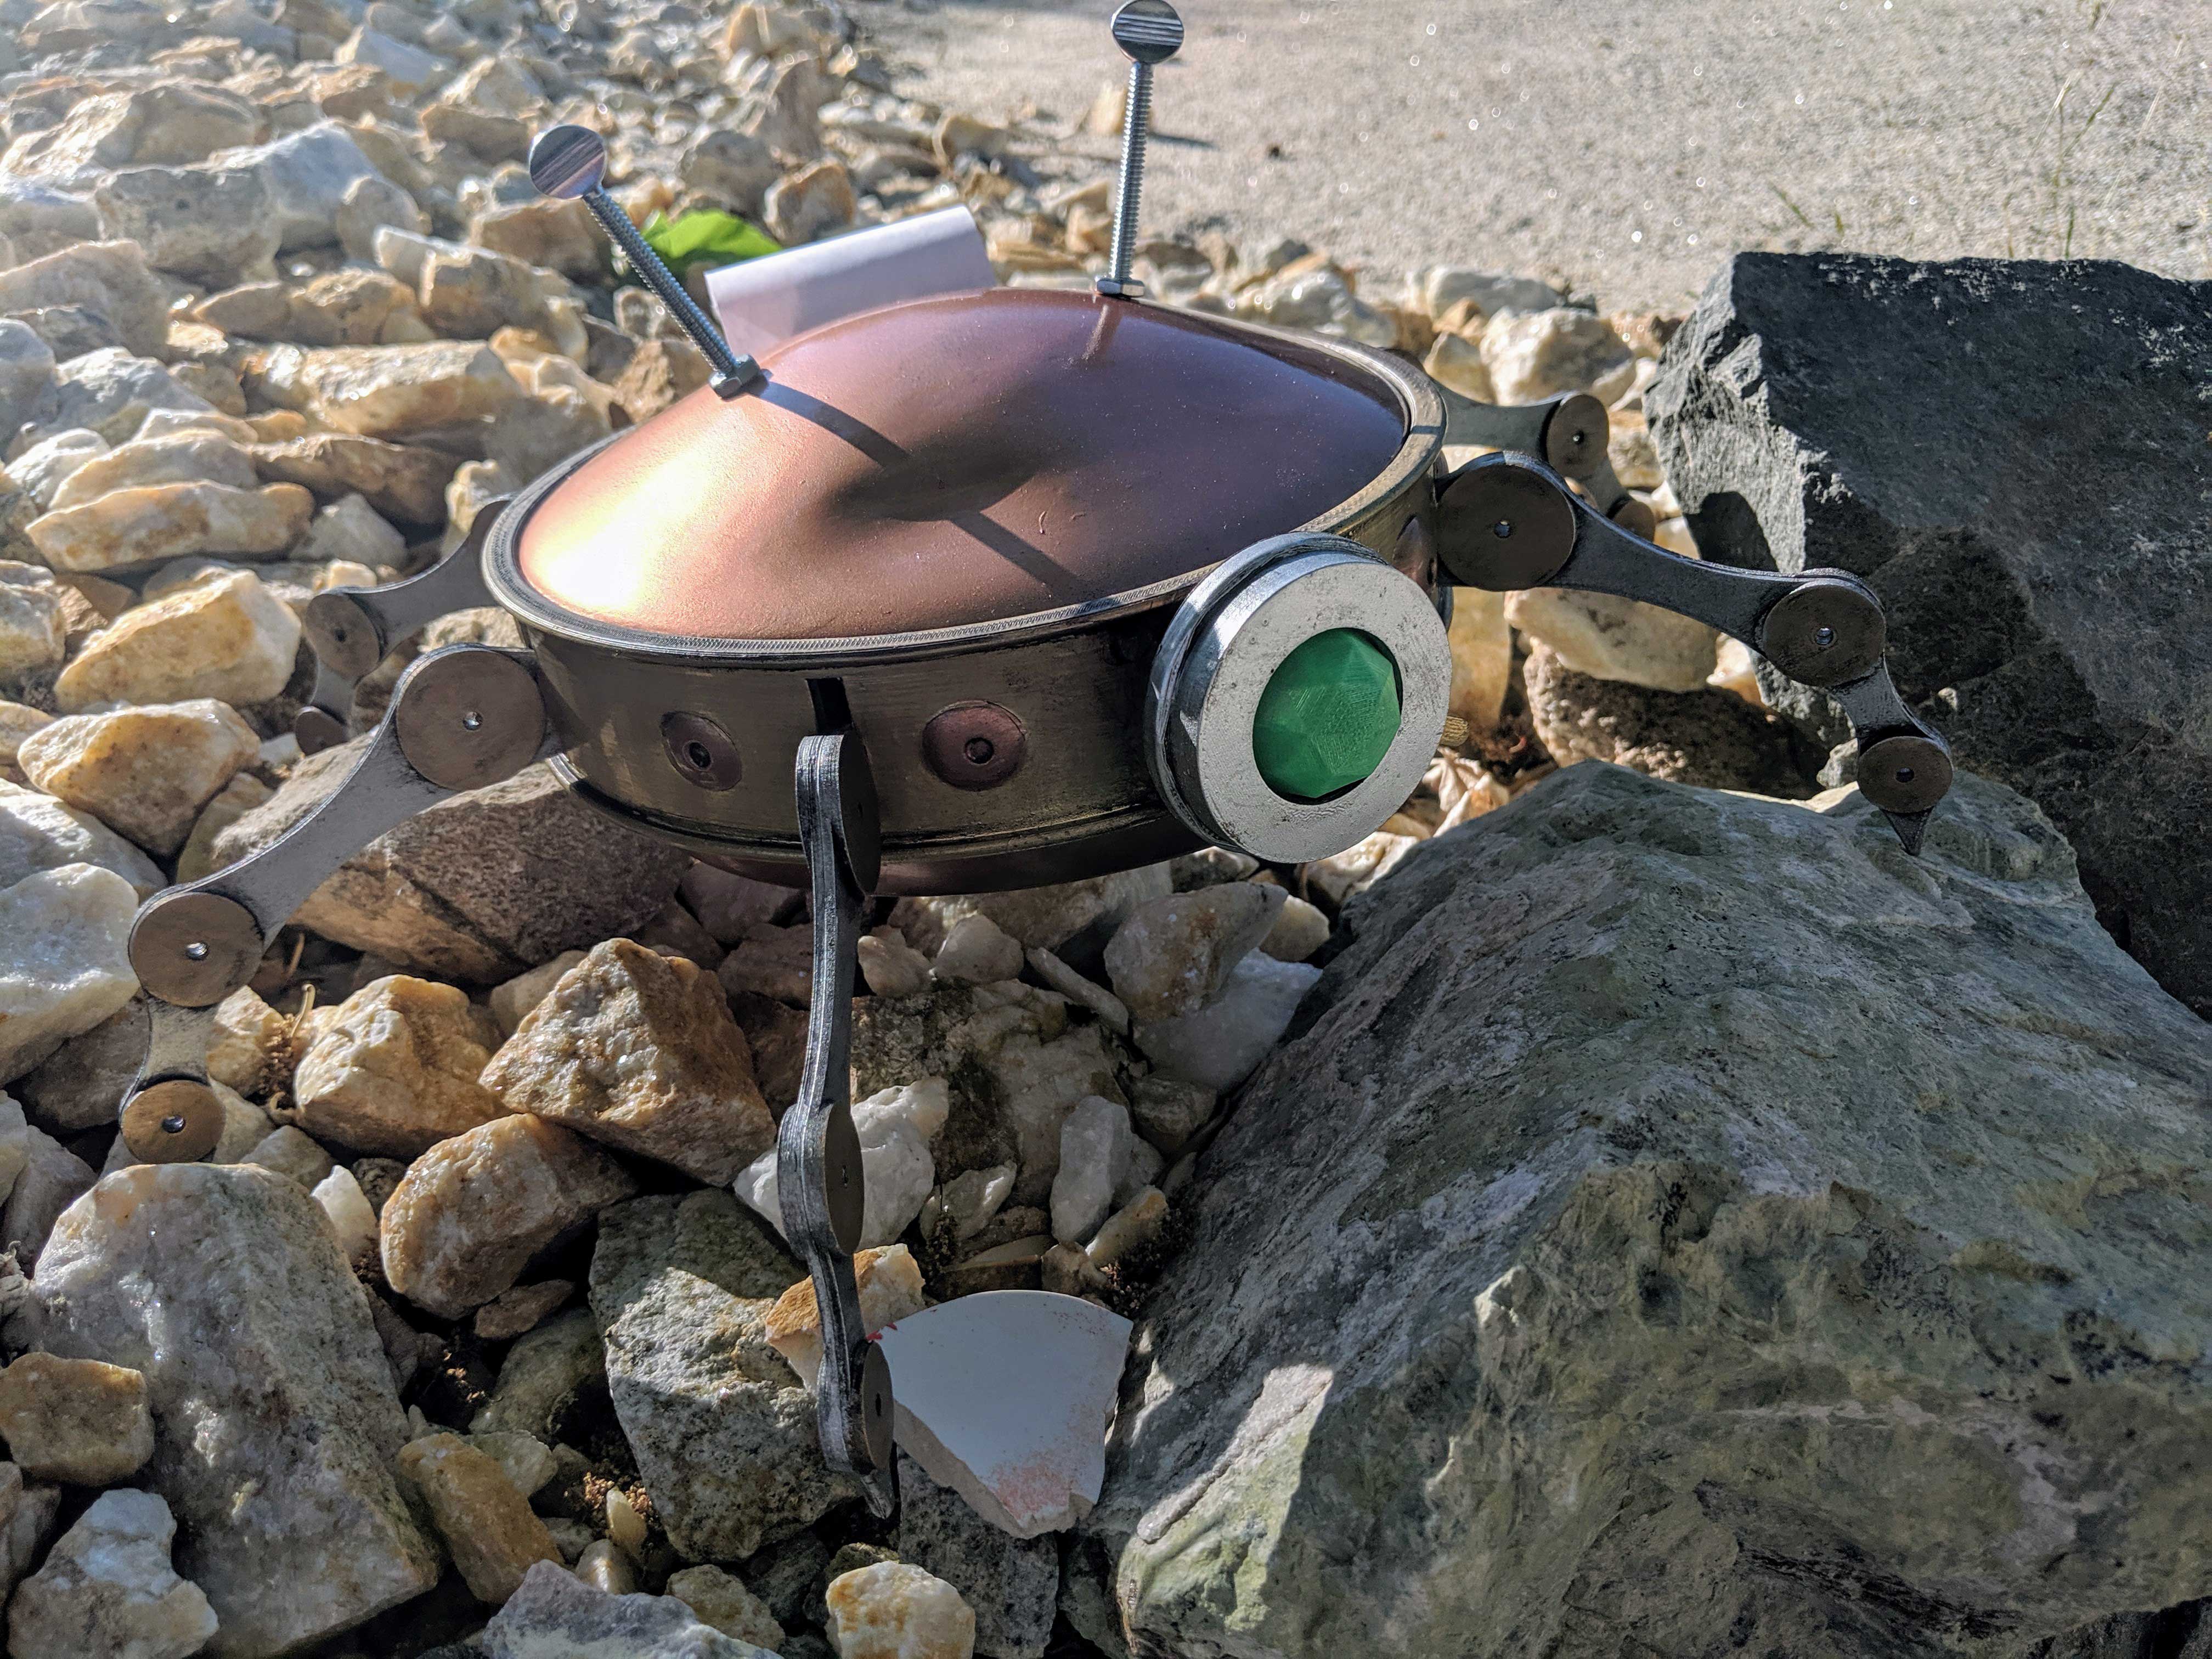
James Bricknell has been a fan of Critical Hit for a long time, and really enjoys Randus Duthane (played by DnDBrian). James took it upon himself to build a model of Radnus’ robot, The Assistant, and it turned out really great!
Take the jump for a rundown of the build process.
About 7 years ago I was working for a delivery firm on the south coast of England. I worked 10-12 hours a day, in my delivery van, just driving about, and it was dull, very dull.
That’s when I found Critical Hit for the first time. I was looking for a podcast about Dungeons and Dragons — I hadn’t been able to play for a couple of years and was jonesing for a hit — and the offering from Major Spoilers appeared in my search.
From that day on I was hooked. I consumed the back catalog at an incredible rate — 6-8 episodes a day depending on length — and started to form a genuine attachment to the characters and the story they were living.
Six years later and I still feel that connection. The difference is I live in Southern California and I get to write for a living, so I have way more time on my hands!
Like Stephen, I am a huge fan of 3D printing and I own several different machines. I wanted to learn how to design in 3D as well, not just print, so I started thinking about what would make a good design.
One of the first things that came to my mind was Randus’ Assistant. It seemed simple enough in my mind, a few semi-circles, some holes, and some legs. Should be easy right? Yeah, not so much.
THE DESIGN
All of my design work was done on Fusion 360. If you are thinking of getting into 3D design you should definitely check it out. It’s free for anyone, as long as you don’t make more than $100,000 using it.
Like most designs, this one started with a drawing or two. I got some help from other Randus fans and I finally landed on what you can see above. The picture on the left is pretty close to the final design.
I started working in Fusion 360 to create the shape I wanted. It was a lot harder to create organic shapes than I thought, things like bumps and dents were really tough.
In my mind, the assistant is hundreds, if not thousands of years old, and along the way — even though it is made of Exilarchy metal — it has picked up some pretty serious bangs. I wanted the design to reflect that and I finally achieved the organic shapes seen below.
The ring itself is fairly simple because Fusion 360 relies on sketches. All you have to do is draw a 2d sketch then use the rotate tool to create the ring.
The assistant’s head was much harder. You have to use a tool called Sculpt to pull the circle into shape. Once I figured it out though I purposely distorted the shape to get the dents you see here. I went even further with the bottom, distorting the shape a lot more.
Adding the rivets was also an enjoyable challenge. I didn’t do as good a job on them as I wanted, something I only found out after I printed the piece. The rivets are actually off to one side, so some of them sunk into the ring while the ones on the other side were too far out. This makes them look small on the left and big on the right.
I decided to leave it, mainly because it was my first attempt and I wanted the whole model to show that. It isn’t a professional piece, it’s a labor of love and I still think it looks awesome and I’m hoping Brian will too.
I really got to go all out on the sketches when making the legs. I had to make sure they reflected the spidery nature of the assistant, and they had to be mechanical. I’m not ashamed to say that the movie Wild Wild West came to the rescue. That crazy steampunk spider at the end was exactly what I had in mind when I was designing.
I also had to make sure they were the right size. They had to be long enough horizontally to reach out past the assistant’s shell, but also high enough vertically to lift his butt of the floor.
I did a little math — too little as it turns out, but more on that later — and managed to get them the right length and height. Everything was coming up Milhouse.
I have to admit, I cheated a little on the assistant’s eye. I knew what I wanted — an iris that opened and closed — and I also knew that it was well beyond my technical scope at that time. I turned to thingiverse.com for help and found this amazing iris for steampunk goggles and I knew that was the right one. Randus definitely has iris goggles right?
In the end, the iris changed a lot, and I think I could have designed the whole thing, as it is now, from scratch, but I’m happy with the result.
And that’s it. The assistant was, on digital paper at least, a reality! It took a lot of time and effort and help from 3 different Facebook groups, but I finally had it all ready to print.
THE BUILD
In case you don’t know, 3D printing takes a while. If you want the prints to look good, you need small layers, printed slowly. I used 0.16mm layer height at 50mm/s to print all of the parts for the assistant and they came out very well. All in all the printed parts took about 50 hours of continuous printing to finish.
So I finally had everything ready. All the design was done and all the files were ready to go into my printer. I used Simplify3D to slice all of the files, and even though, as a company, it has dropped the ball lately, the software still slices the best supports I’ve seen.
My printer of choice for things that are important is the Prusa Mk3. It is easily the best printer you can buy for under $1000 and gives me consistently fantastic prints all day. If you are interested in knowing more check out my review over at Windows Central.
I used an entire roll of Prusament to build the assistant as well. It needed a lot of support to make sure the curves stayed curvey, in fact, the support weighed more than the final parts!
Luckily there is an industrial composter close to where I live. PLA plastic is biodegradable and the composter takes my leftovers and failed prints for me. In six months it will have rotted down to nothing. Win-Win!
Once you 3D print something you really get to see where the issues are, and the assistant was no exception. I mentioned earlier that the rivets were out of place, and even at 0.16mm layer height, you can see how deep those lines were around the dents in its body.
Oh, remember the leg problem I mentioned earlier? Turns out, I measured the length and the height correctly but not the width. The legs were printed in halves, and when they are put together they are just too big for the slots made for them.
I had to cut away at the slots in the assistant’s butt to make them fit. All of the ugly work is, fortunately, inside the body of the assistant so you won’t ever see it, but it goes to show you the problems that can occur.
The last issue I had in the print was the size of the bottom half. Inexplicably it was about 2mm too big. Instead of reprinting it — I had just run out of filament after all — I elected to use hot water to solve the issue.
PLA goes soft at very low temperatures, around 60 degrees Celsius (140 degrees Fahrenheit) so if you soak the model in hot water you can get it to deform. I used this method to mold the top half of the bottom piece so it would fit into the ring.
This had the added bonus of making the whole shape more organic, adding a feeling that Randus had used a hammer and anvil to fix it at some point.
THE FINISH
Sanding and Painting
3D plastic is never as simple as just painting. There are so many steps along the way if you want the final product to look like anything other than plastic. I used a lot of tools to get this done and there were plenty of steps. Let’s rush through them.
Be prepared to sand for hours. If you really want to make plastic look like metal you have to remove every layer line you can. I went back and listened to the entire 5e campaign from Critical Hit while hand sanding every piece. Using a power sander on PLA is always dicey. You could easily roll a 1 and melt the plastic instead of sanding it. Always best to do it by hand.
I started off with a 100 grit paper to cut away most of the bad layers, then steadily moved up to 160, 220, then finally, 400. I could have gone further but the 5e campaign finished and I was tired. (Town be with you)
Smoothing
I manage to get the layer lines down to a respectable level then used 3M acryl spot putty to smooth out the rest. Be careful if you are going to use it, it burns the skin so wear nitrile gloves if you can. You are going to be inhaling dust and paint as well, so wear a ventilator if possible.
Once I had it sanded and spot filled, I hit the whole thing with Primer Filler — it took an entire can to cover everything — and once it was dry, started all over again. You want to spray every part with at least two good coats of primer filler, and sand between each coat too.
Painting
Here is where everything slows down. You need to take your time with painting. It’s easy to get excited, after all, you are nearly at the end now, but rushing the paint job is a disaster. I am the worst painter in the world and even I let each coat dry for at least 12 hours before going on to the next.
Each individual part needs several thin coats of paint. If you are serious about painting then don’t do what I did. I used rattle-can paints — the kind you spray your car with — and while they look good, they are too thick to really do the fine detail I needed. If you can, buy a paint gun and compressor to really do a proper job.
I started off with a layer of black gloss. This is a trick I picked up from Adam Savage of Mythbusters fame. Using black gloss under metallic paint makes the paint more lustrous, and if you do miss spots it just looks weathered, not terrible.
I used masking tape to cover up the gold ring then cut circles out for the rivets to be sprayed. In hindsight I should have sprayed the whole ring brass, then covered up the rivets and sprayed the whole thing gold. I think that would have given a better look. Ah well, we live and learn.
I used one of my favorite painting techniques on the legs. A paint called Rub ‘N Buff was applied to the circles on the legs to produce a solid gold with its own unique texture. Once it was applied and left to dry, you can buff it with a cloth to make it really shine. I love Rub ‘n Buff.
TYING IT ALL TOGETHER
I forgot to print a part! As I said earlier the Iris wasn’t really working for me, it was a great piece of engineering but didn’t feel in keeping with the world of Critical Hit. All of the Exilarchy felt, to me at least, to be technomancy — technology with loads of awesome magic thrown in — and I wanted the assistant to reflect that.
In the end, I used a transparent green filament I had laying around to make a multifaceted eye. It also reminds me of a d20, and in my head, it’s always 20 side up, so at least Brian can get a critical hit when he looks at this.
Now that I had the iris I picked up some small, battery-powered LED’s to fit in the front. I figured this would give it a soft green glow that Brian can turn on and off at his pleasure. While I was out buying things some long wing nuts caught my eye. The way Trelle made cooing noises at the assistant made me think he was cute and these little “ears” help with that effect.
Weathering
Thanks again to Adam Savage, I realized the assistant wouldn’t make sense if it was really clean. The world of Critical Hit, like almost all fantasy settings, is pretty dirty. Smoke from chimneys, bonfires, and Ket randomly setting the world on fire is going to cause a lot of soot in the air. The assistant is bound to get pretty dirty even if Randus tries to buff him up, so I wanted the model to reflect that.
The easiest way to achieve a good weathering effect is acrylic paints. Using Burnt Umber, and good old black, I gave every piece, except the green lens, a wash of color. Almost immediately I wiped it off as best I could. The paint that’s left behind finds its way into the scratches and dents I couldn’t buff out.
With a slightly damp cloth, I then cleaned the visible areas, as you would in real life. This gives the effect of dirt accumulating in the corners where your rag can’t reach. Of course, the assistant will be dirty, it’s got to be hard to clean him with only one arm!
Finally, it was time to put him together. I assembled the last pieces, including gluing the leg halves into place. I then used zip ties to create tension between the legs so that he didn’t rest on his bottom the whole time, instead who looks poised, ready to swap out any weapon Randus needs.
Lastly, I bolted on his new ears and fed a little calculator paper through the slot at the back. Rodrigo mentioned that the Assistant uses ticker tape to talk to Randus so this was the closest thing I could find.
THE END
And there we have it, a true labor of love, of many loves really.

I love Critical Hit too. The gang is like friends you never get to see, but they are always there to cheer you up. Once a week maybe, or, if you’re like me, every day, they fill your ears with adventure, laughter and sometimes, even sadness.
I’m proud to be a patron of this amazing show, and I’m lucky I can make something as cool as this assistant to show these fine people how much I appreciate them.
P.s; Randus is the best.
Unboxing the Assistant
DnDBrian unboxes “the assistant” built by James Bricknell (@keridel on Twitter).Check out the build article here https://majorspoilers.com/2019/05/31/building…
Thank you James! You can follow James on Twitter @Keridel to see more of his work.
Dear Spoilerite,
At Major Spoilers, we strive to create original content that you find interesting and entertaining. Producing, writing, recording, editing, and researching requires significant resources. We pay writers, podcast hosts, and other staff members who work tirelessly to provide you with insights into the comic book, gaming, and pop culture industries. Help us keep MajorSpoilers.com strong. Become a Patron (and our superhero) today.


2 Comments
This was absolutely amazing! Like the author had been doing previously, my job involves a lot of driving to and from various sites. I spend a lot of time on the road and I can’t get enough of all the Major Spoilers content. You truly do feel like they are your friends that you don’t get to see.
Awesome work and a ton of effort on your part, Mr. Bricknell. Thank you for sharing! Reading the whole process and what all went into creating the Assistant really opened my eyes to the world of 3D-Printing and design. Good. Stuff.
Wow, that’s really impressive!